Node Builder Workshop – Build a Start9OS Bitcoin Node
Date: 2025-11-13
Presenter: Round Rock Bitcoiners
Outline & Notes
Node Builder Workshop – Build a Start9OS Bitcoin Node
Date: November 13, 2025 Presenter: RRBTC
Event Overview
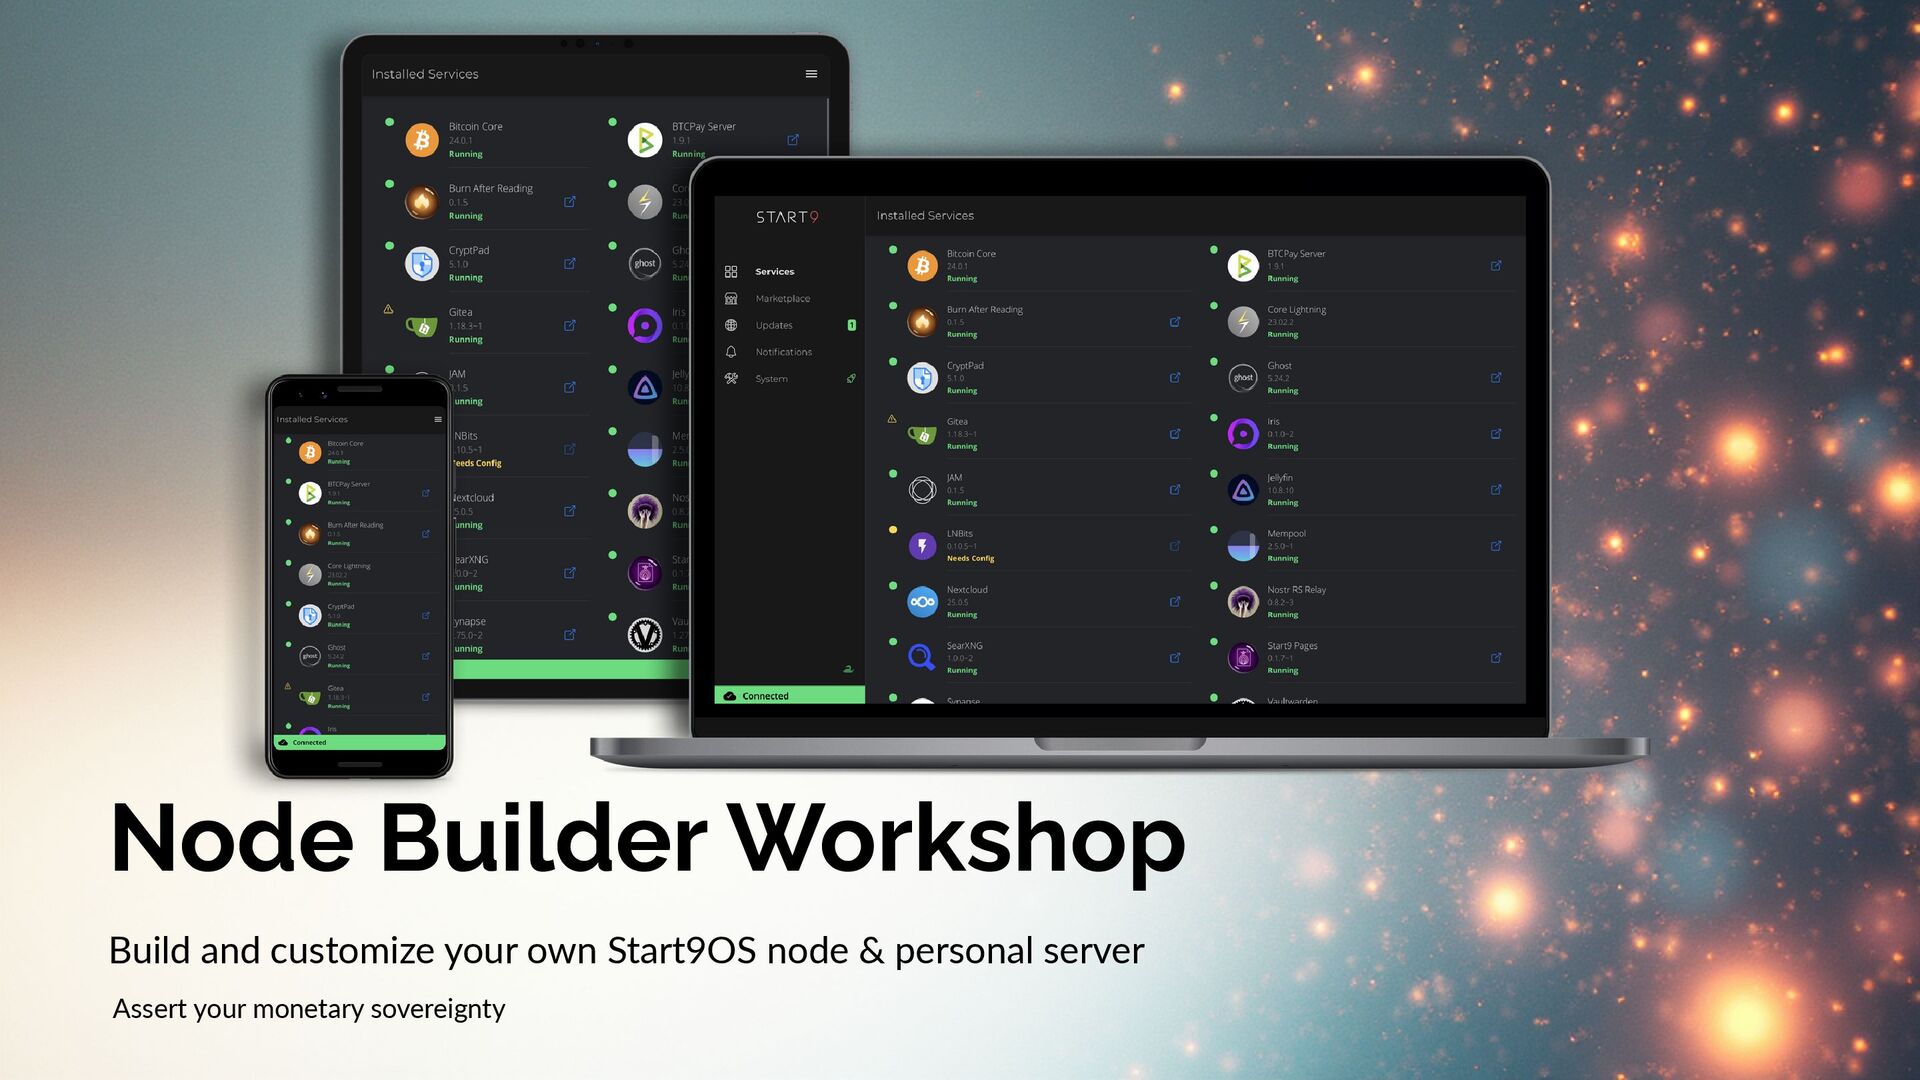
Hands-on workshop to build a DIY x86 Start9OS node and personal server. Assert monetary sovereignty.
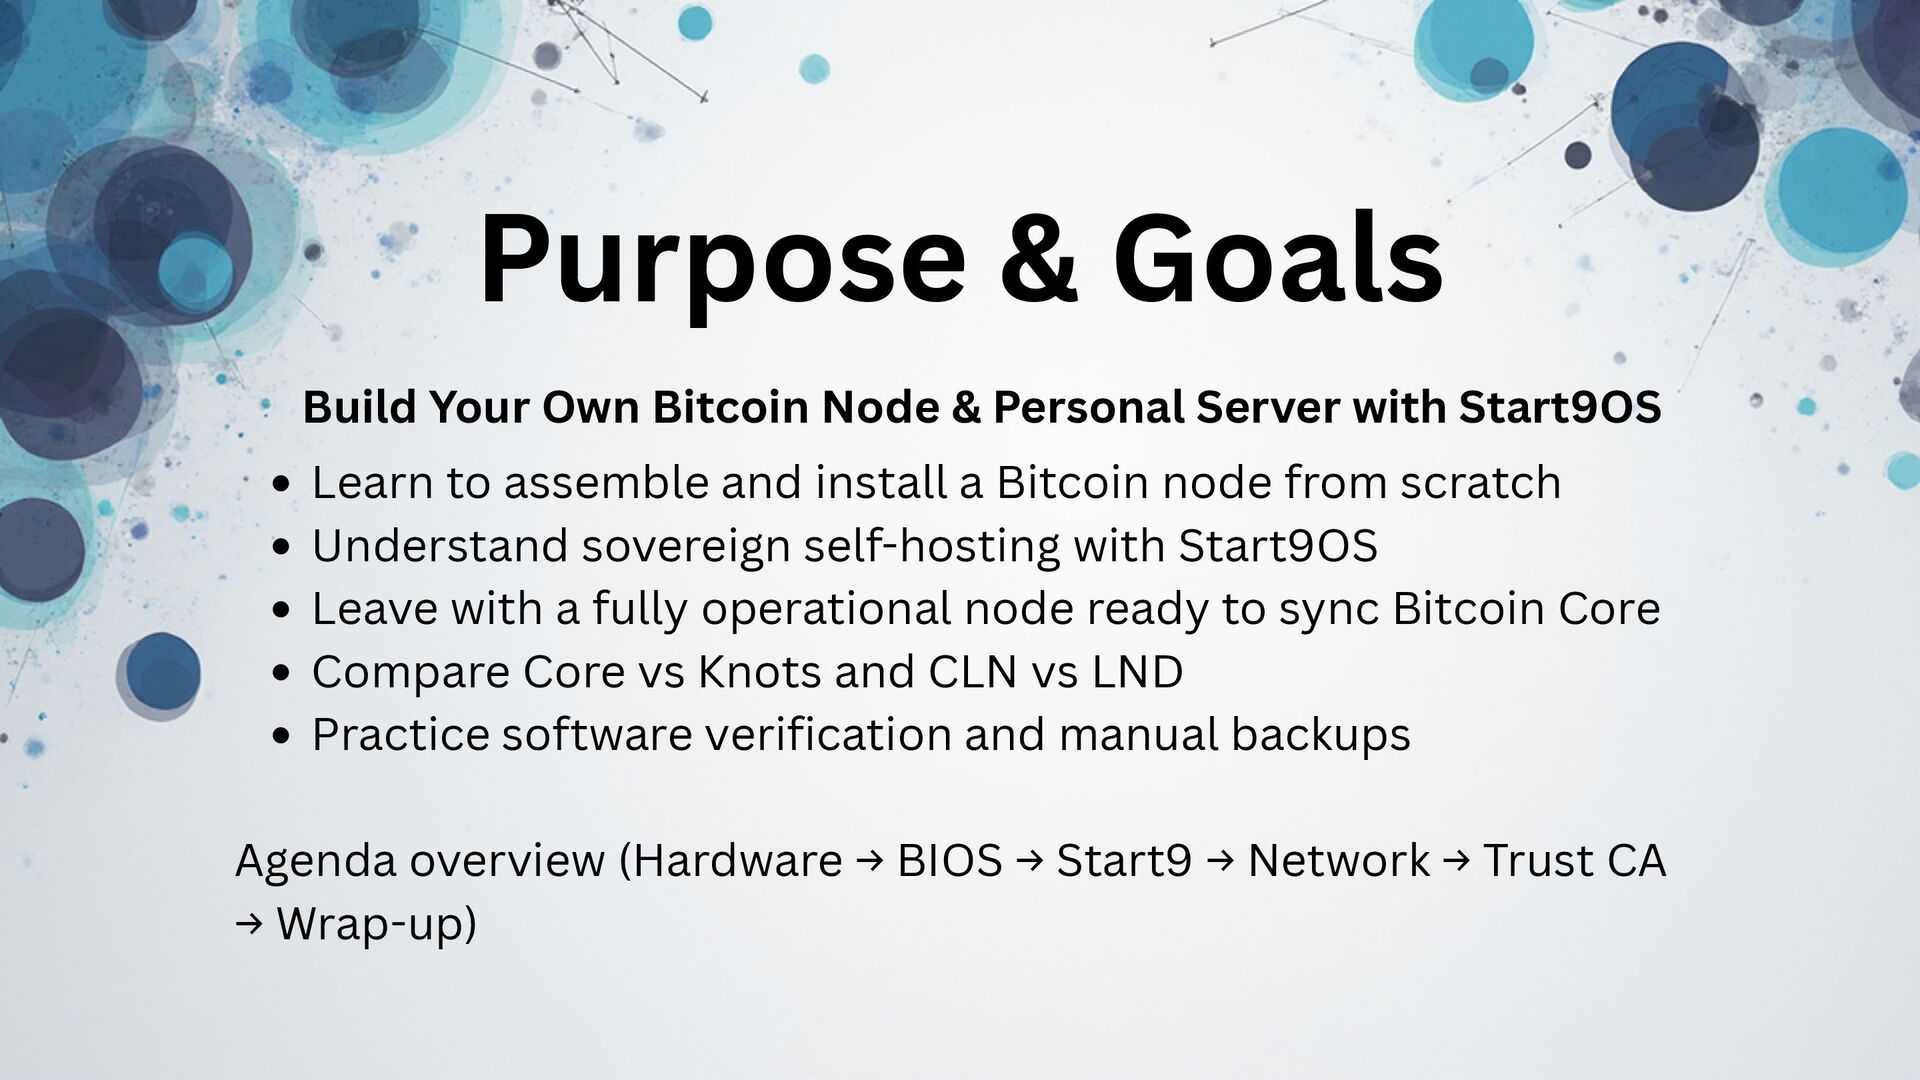
Workshop Goals
- Assemble and install a Bitcoin node from scratch
- Understand sovereign self-hosting with Start9OS
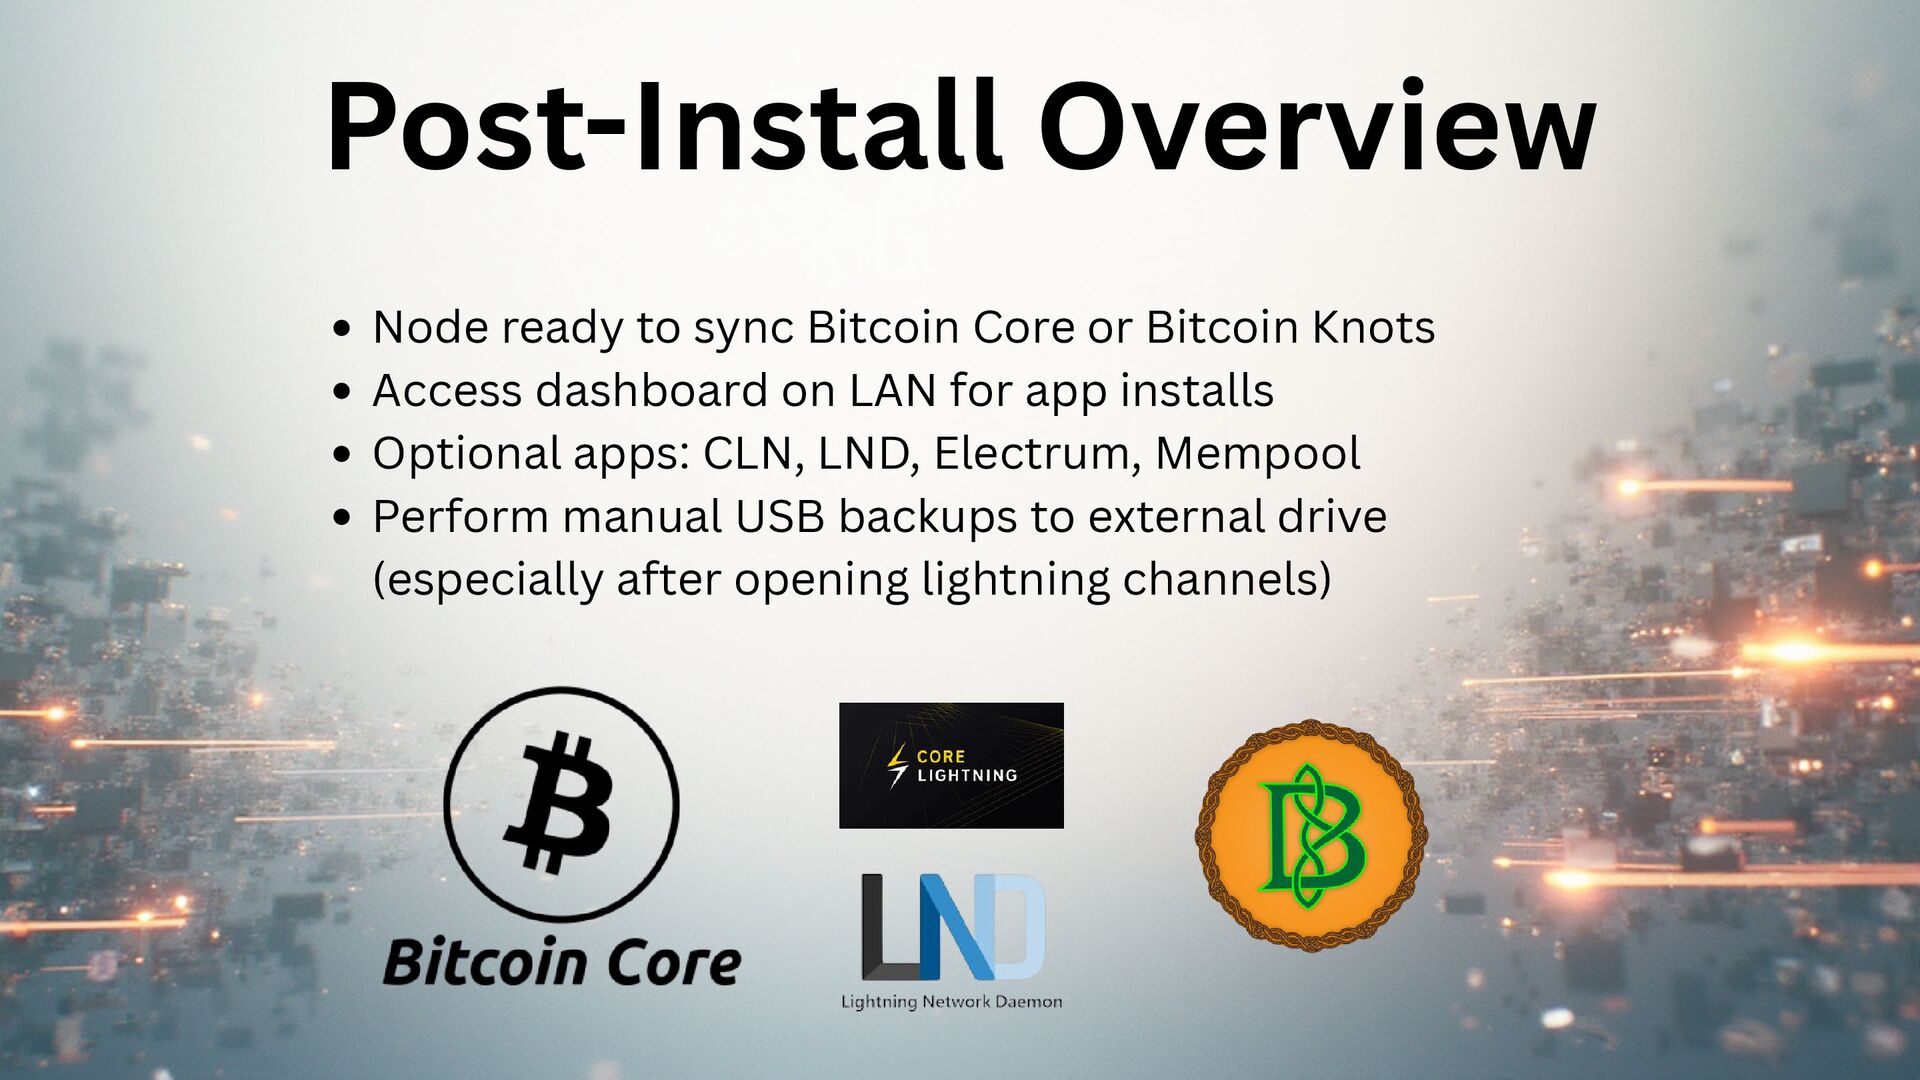
- Leave with a fully operational node ready to sync Bitcoin Core or Knots
- Compare Core vs. Knots and CLN vs. LND
- Practice software verification and manual backups
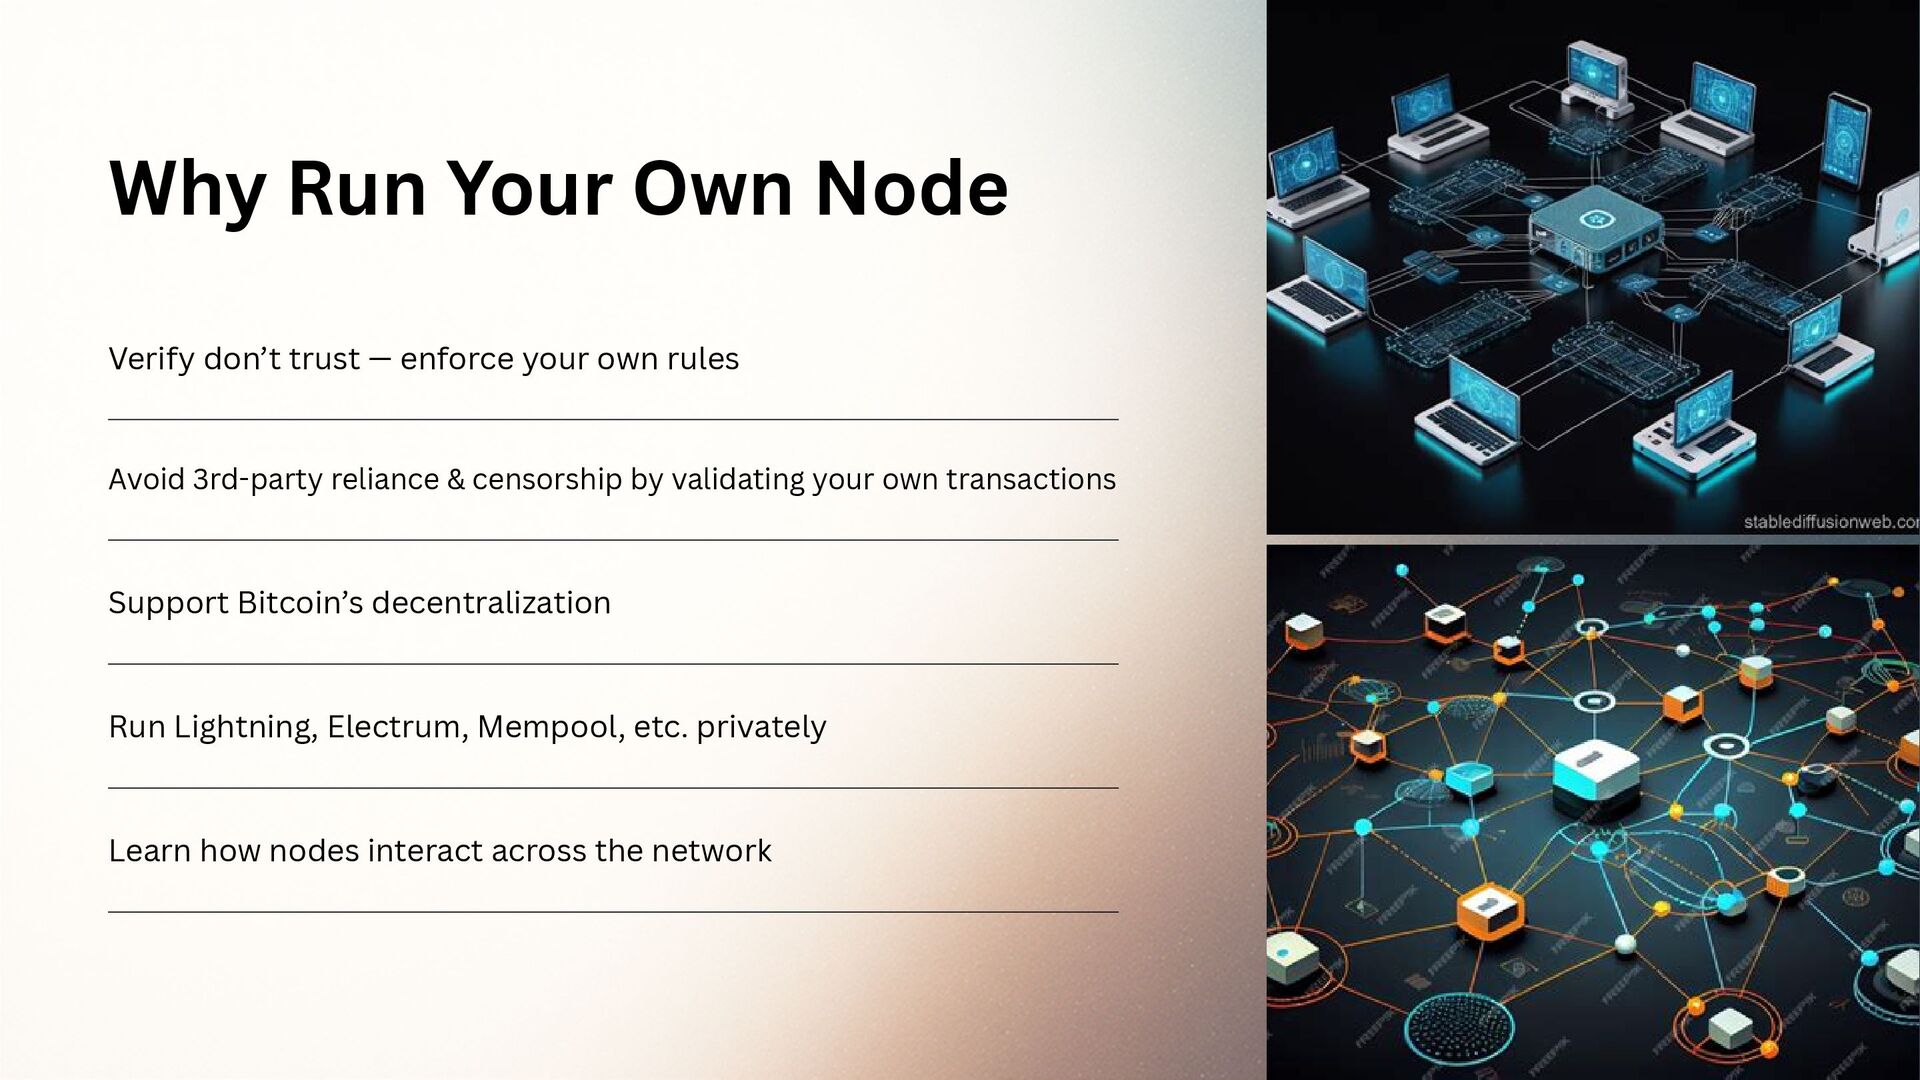
Why Run Your Own Node
- Verify don't trust — enforce your own rules
- Avoid 3rd-party reliance & censorship
- Support Bitcoin decentralization
- Run Lightning, Electrum, Mempool privately
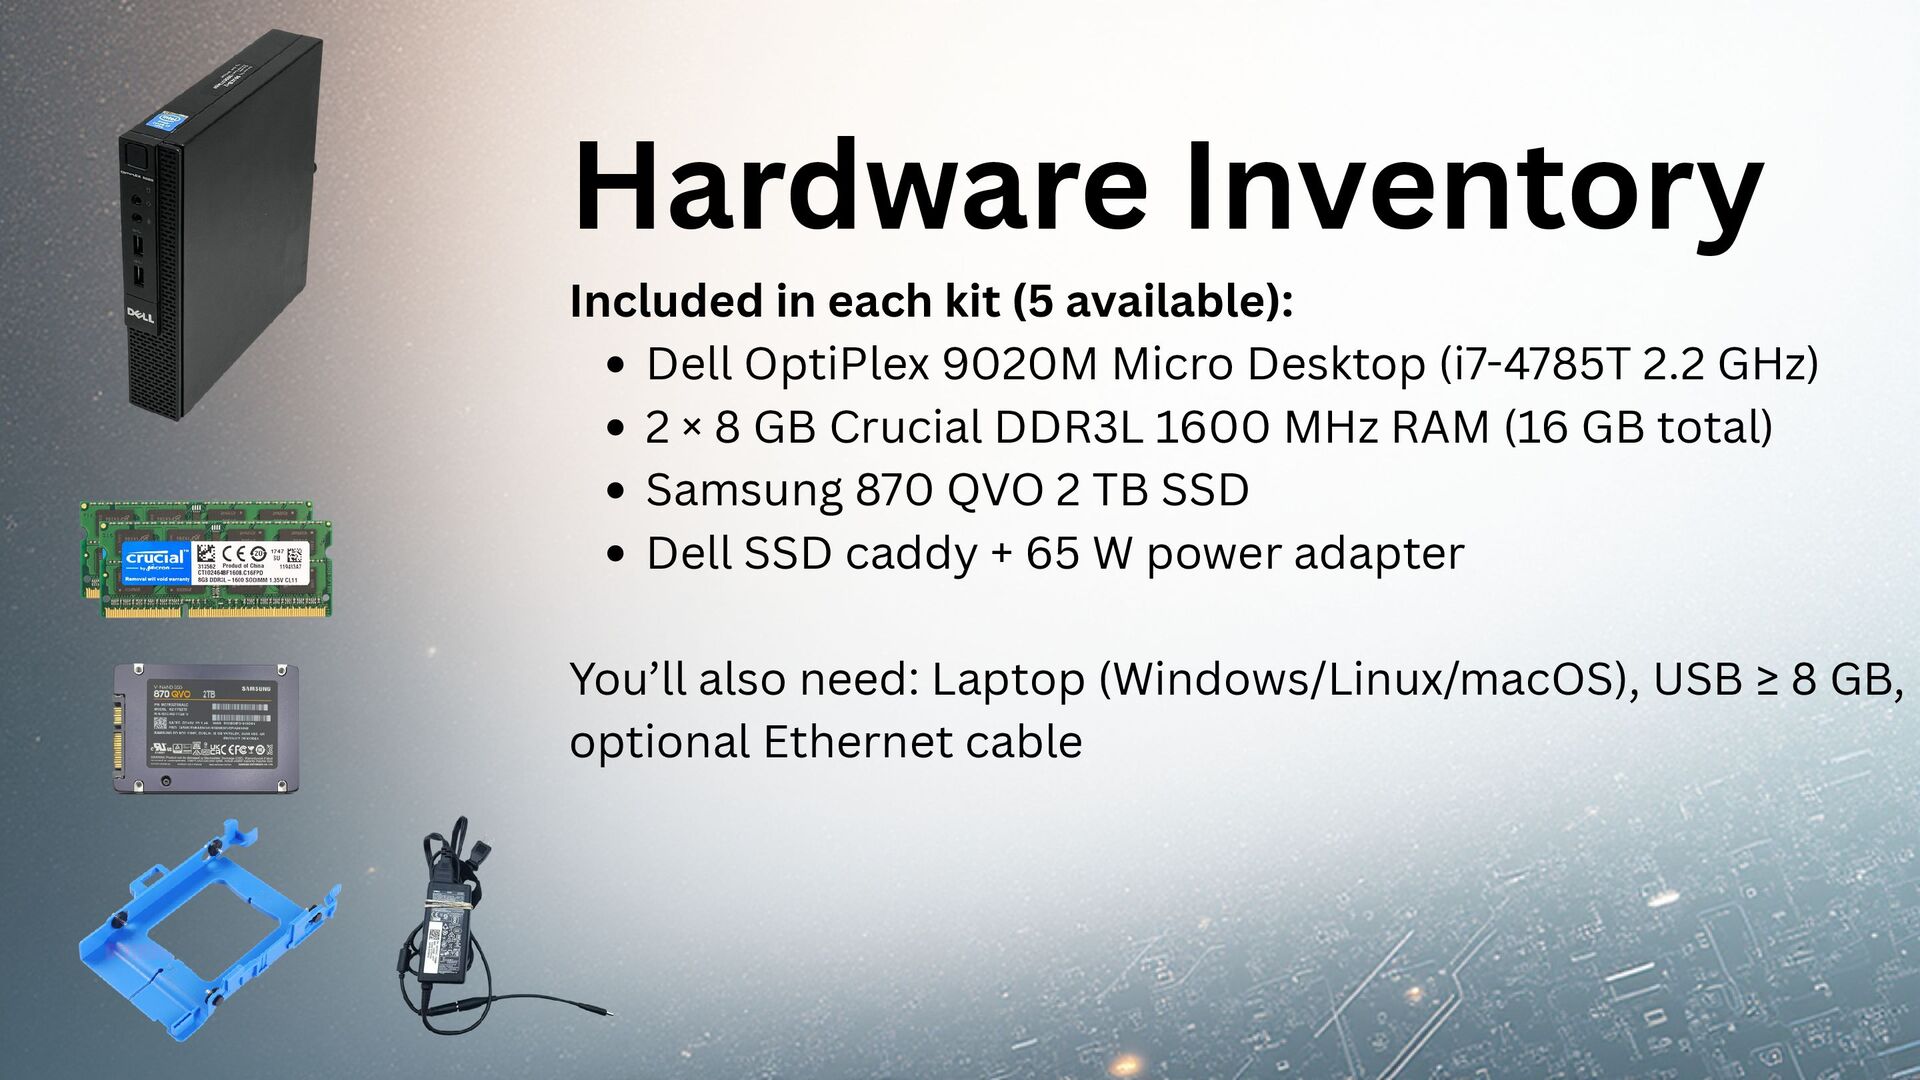
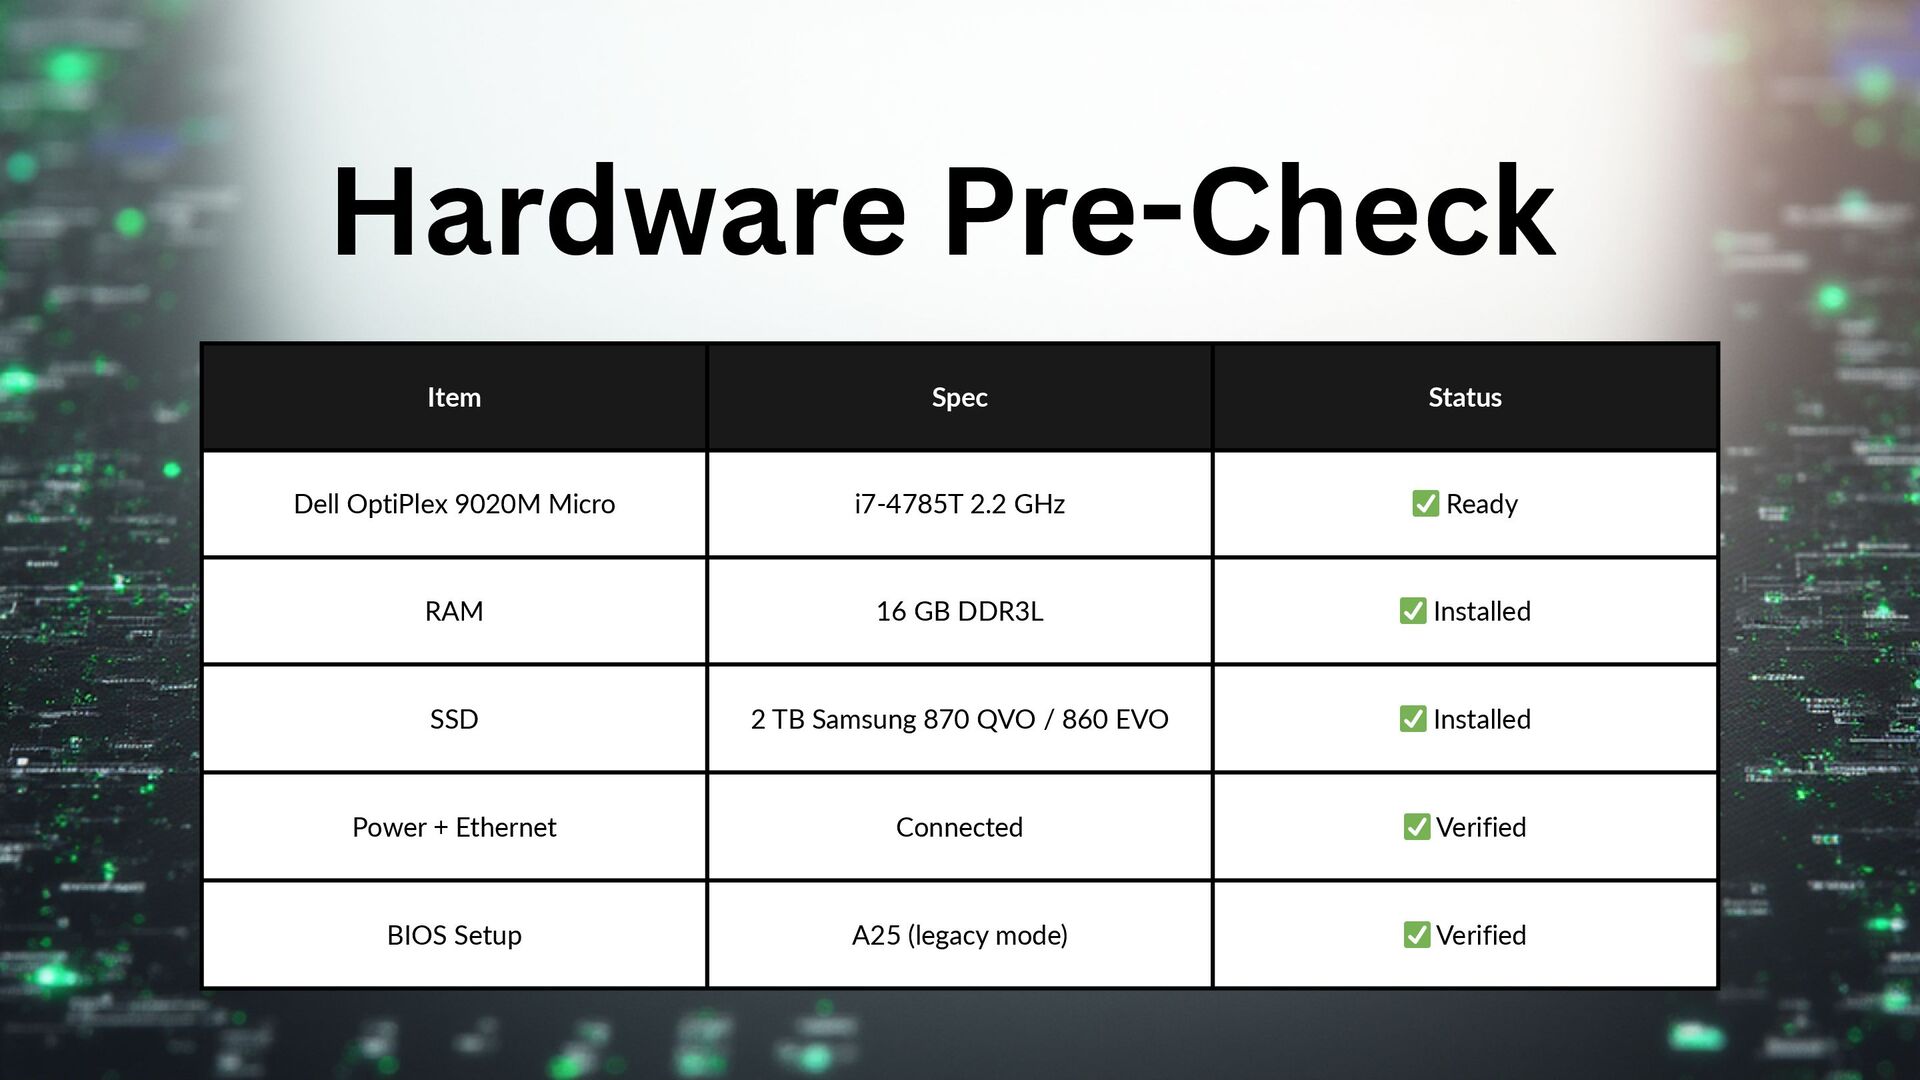
Hardware Inventory
| Component | Spec | | Desktop | Dell OptiPlex 9020M Micro (i7-4785T 2.2 GHz) | | RAM | 16 GB Crucial DDR3L 1600 MHz | | SSD | Samsung 870 QVO 2 TB |
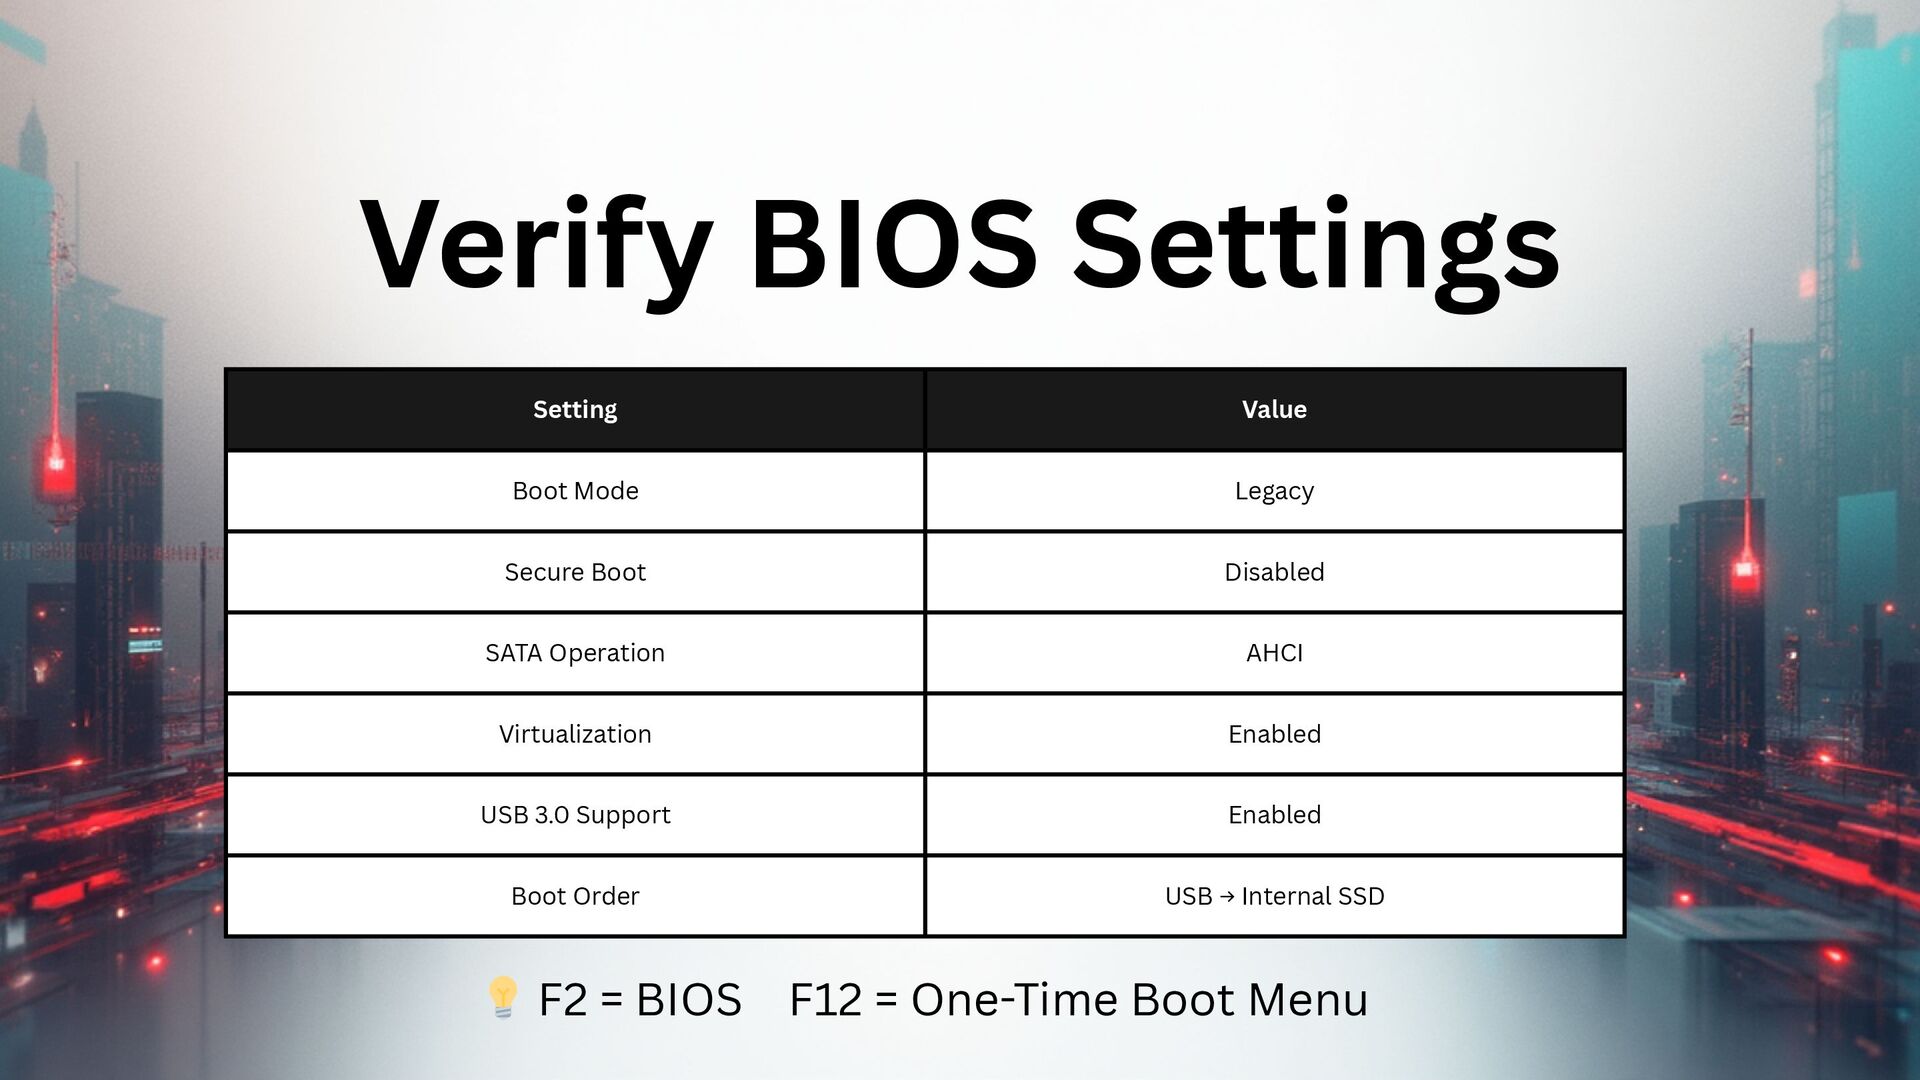
BIOS Configuration
- Boot Mode: Legacy
- Secure Boot: Disabled
- SATA Operation: AHCI
- Virtualization: Enabled
- Boot Order: USB → Internal SSD
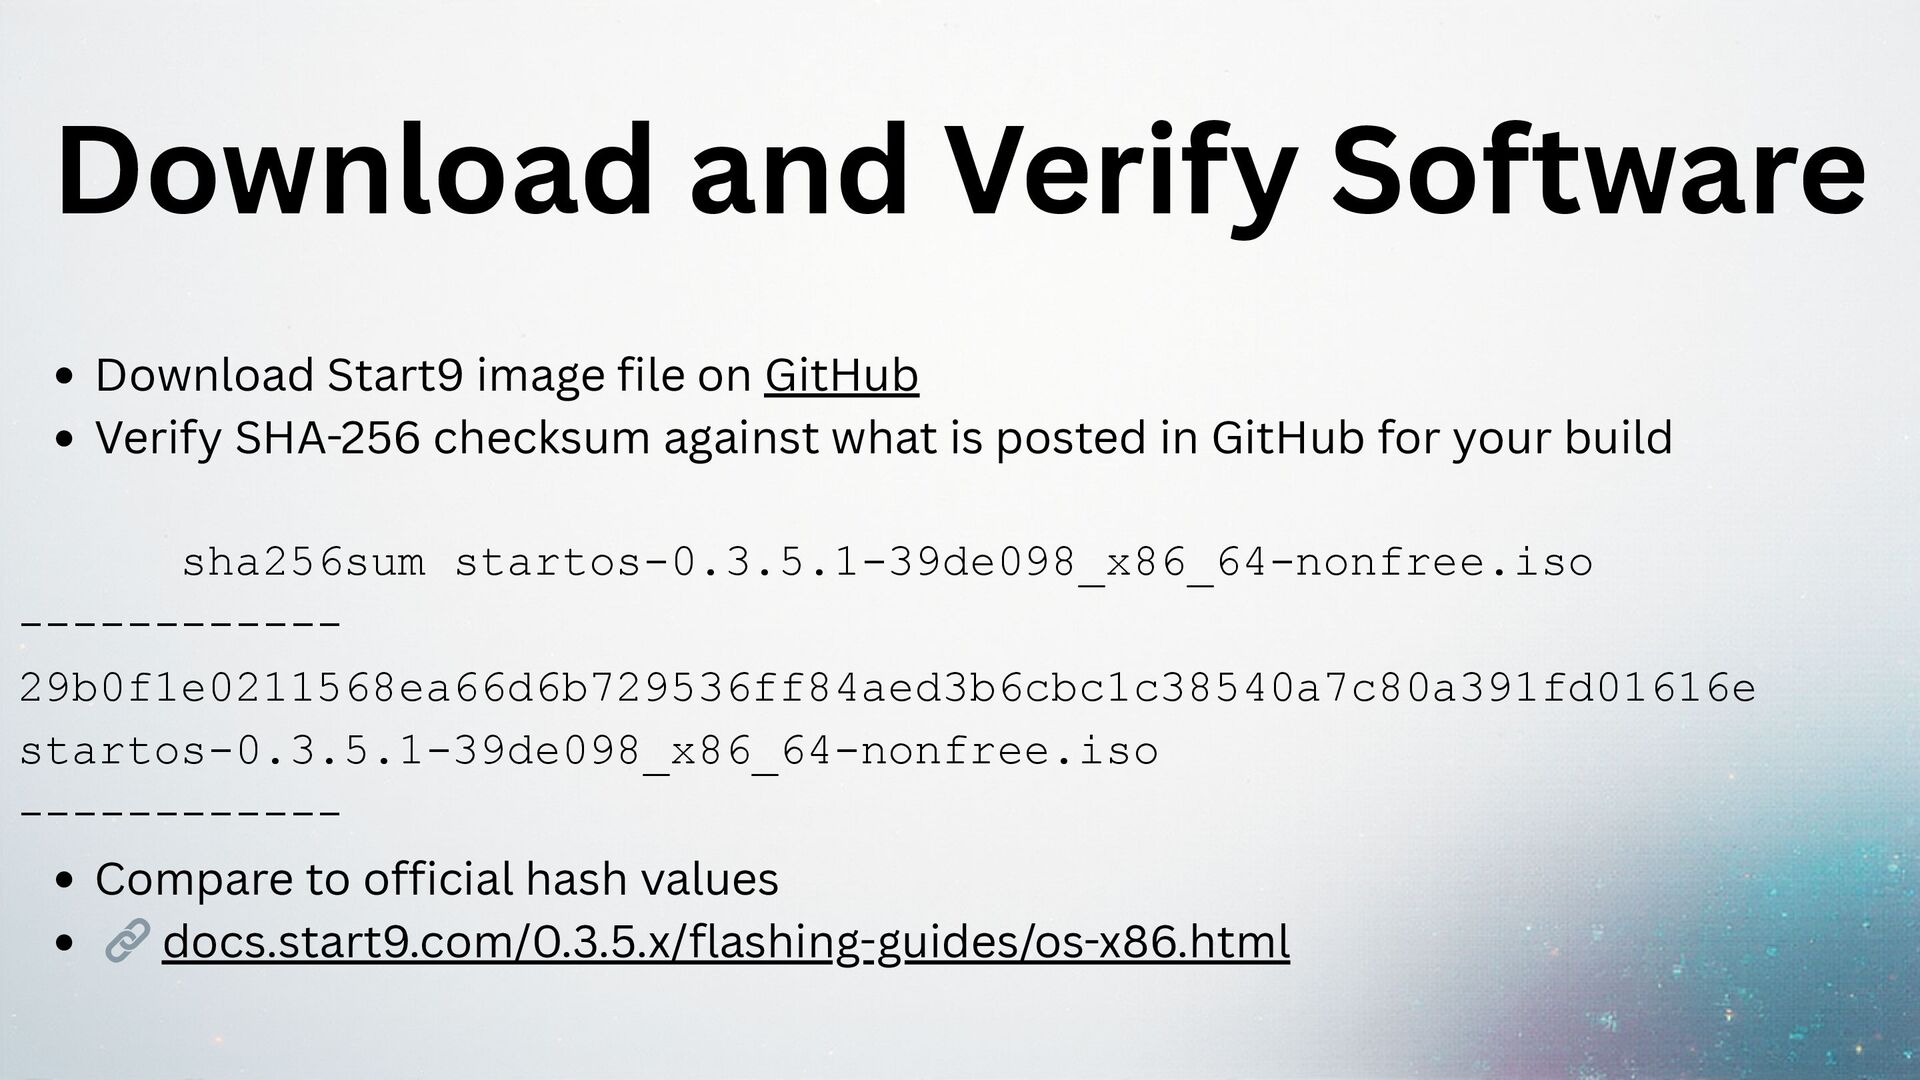
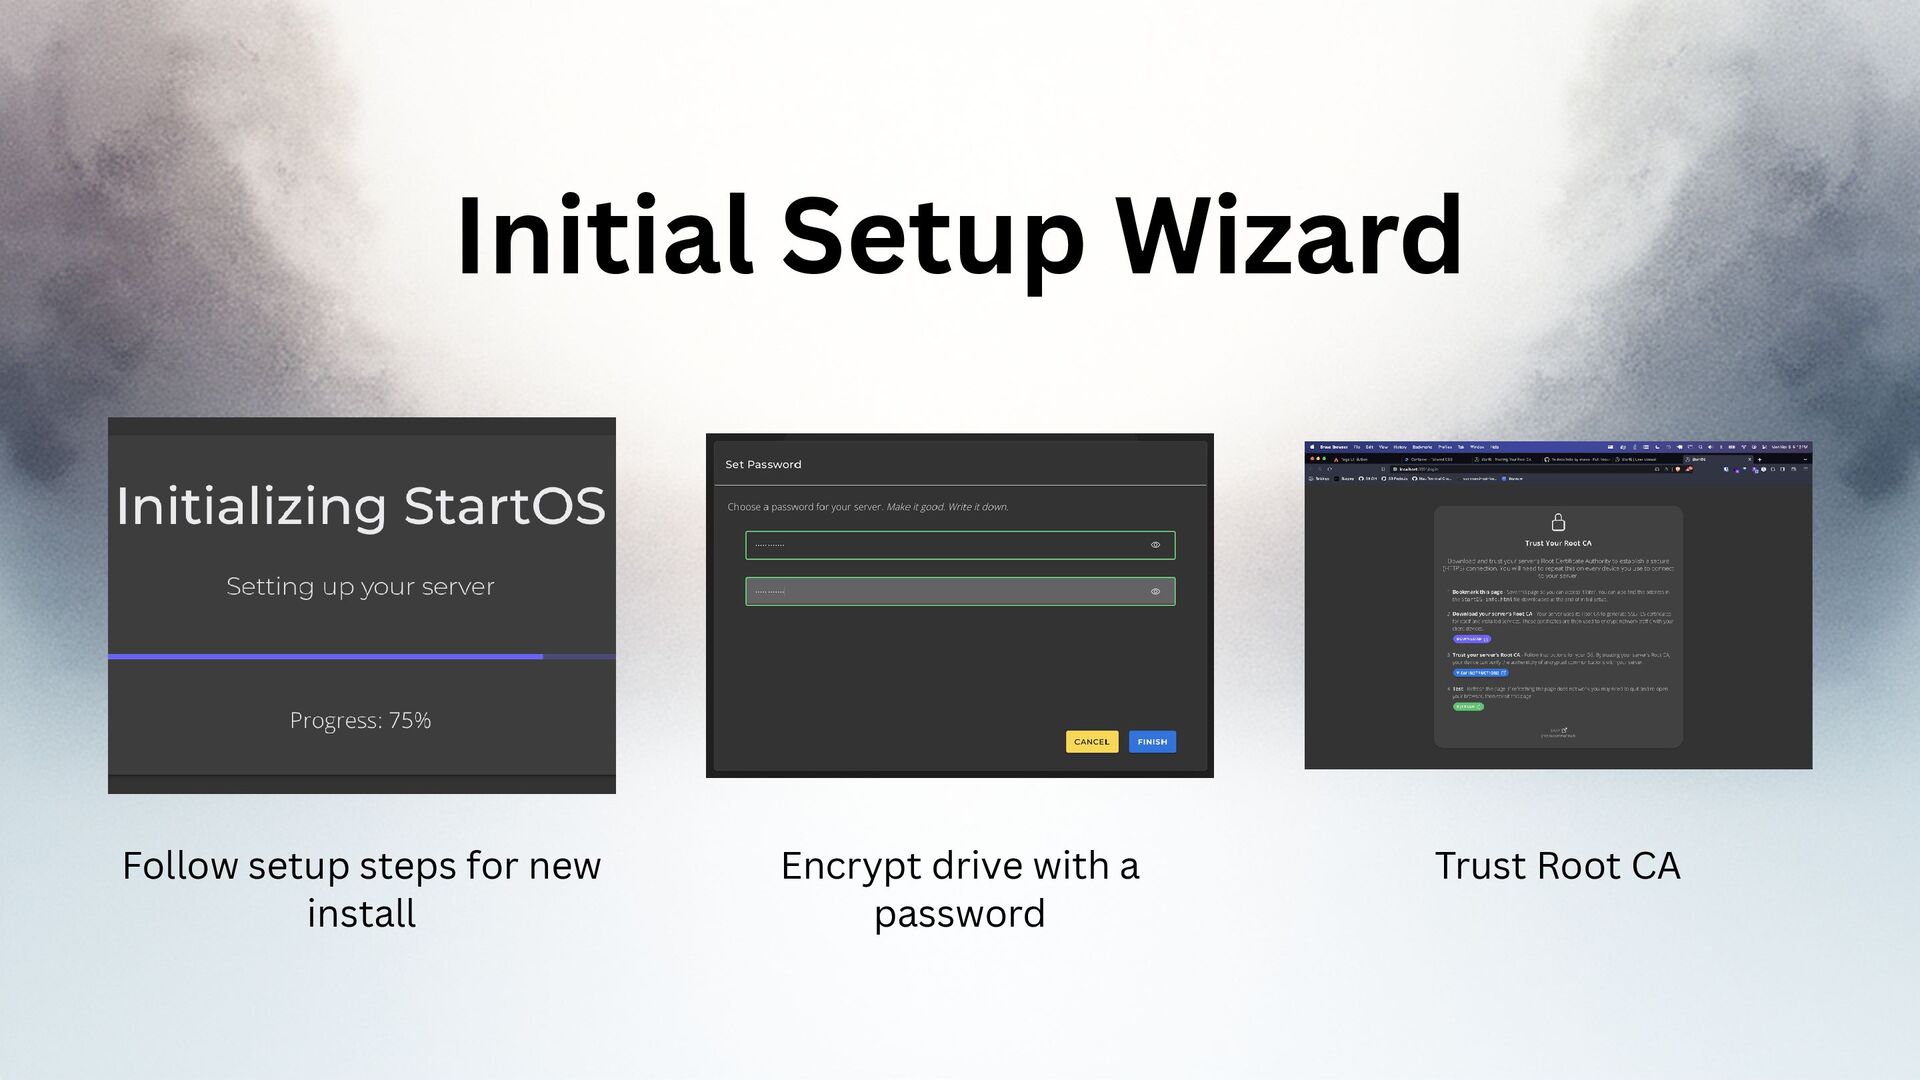
Software Verification
Download Start9 image from GitHub and verify SHA-256 checksum.
sha256sum startos-0.3.5.1-39de098_x86_64-nonfree.iso
# 29b0f1e0211568ea66d6b729536ff84aed3b6cbc1c38540a7c80a391fd01616e
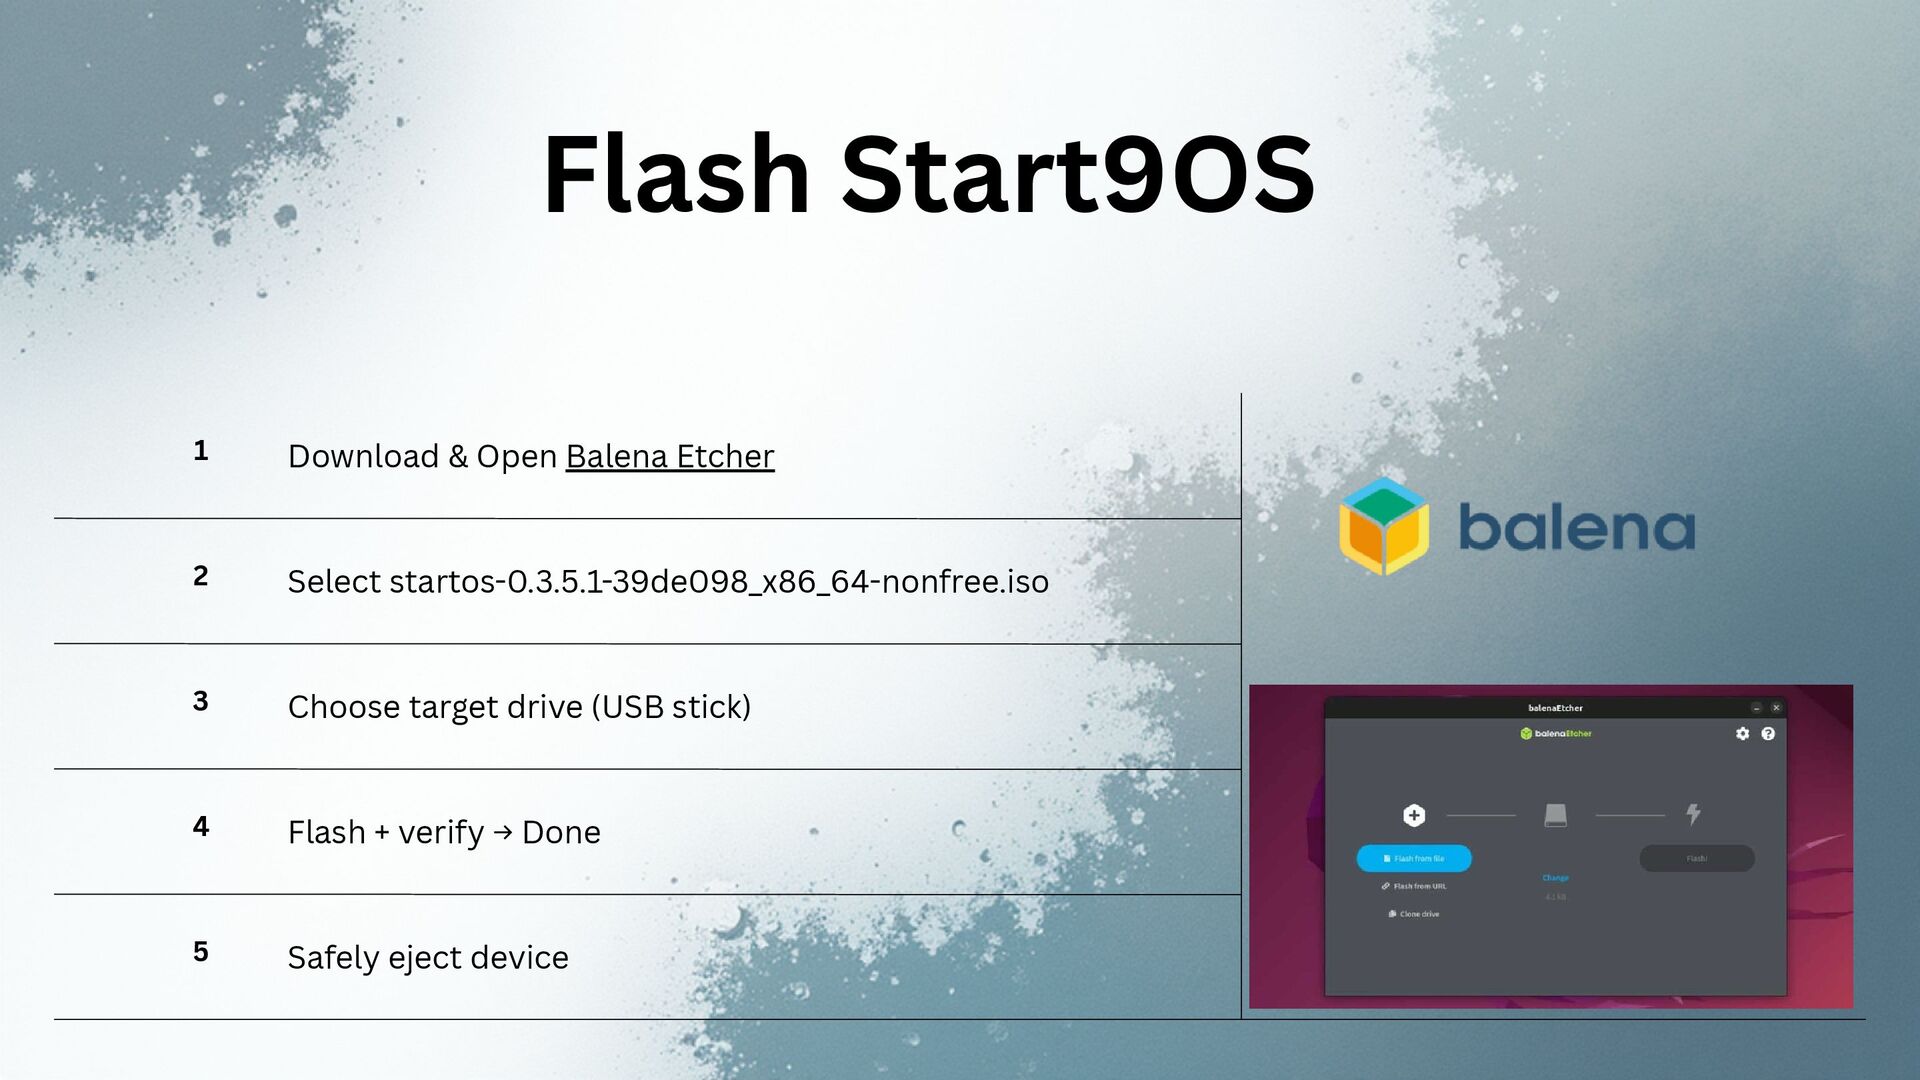
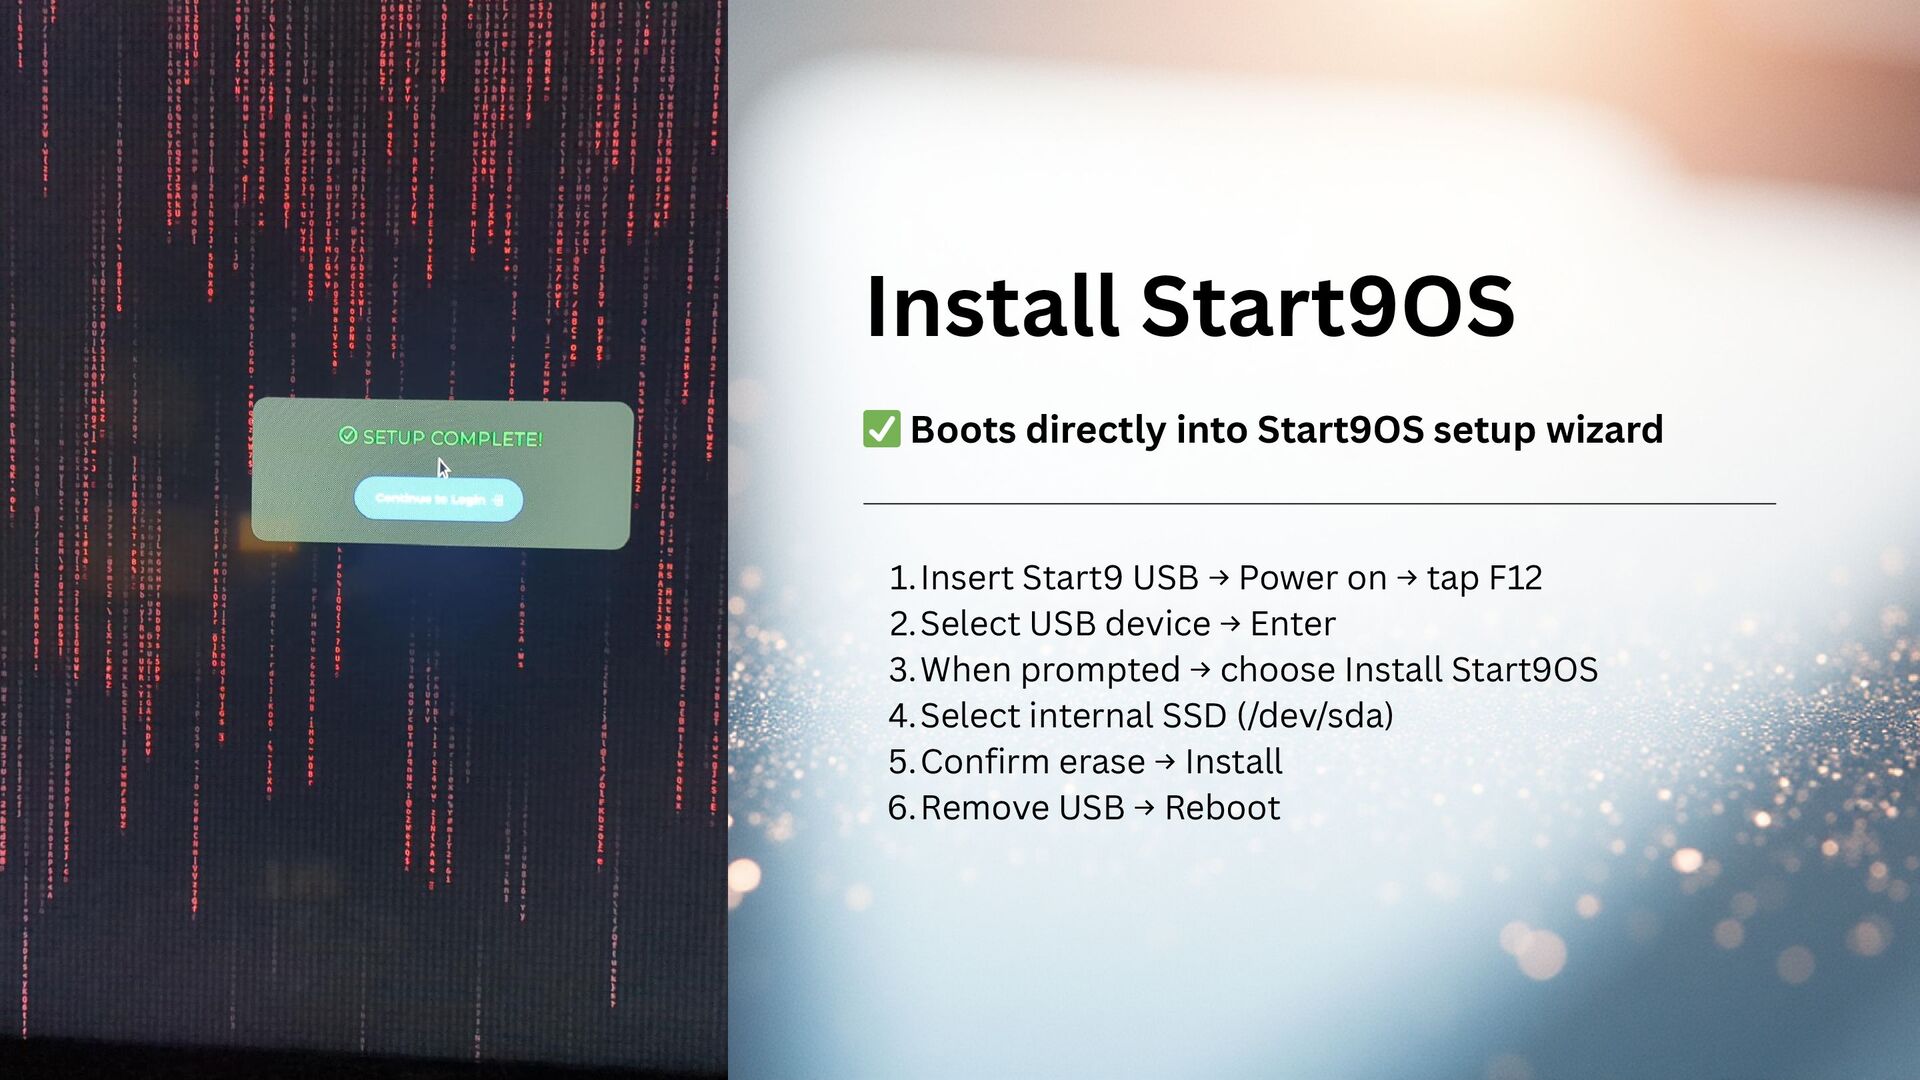
Flashing & Installation
- Flash Start9OS to USB using Balena Etcher
- Boot from USB (F12), choose Install Start9OS
- Select internal SSD, confirm erase, install
- Remove USB, restart
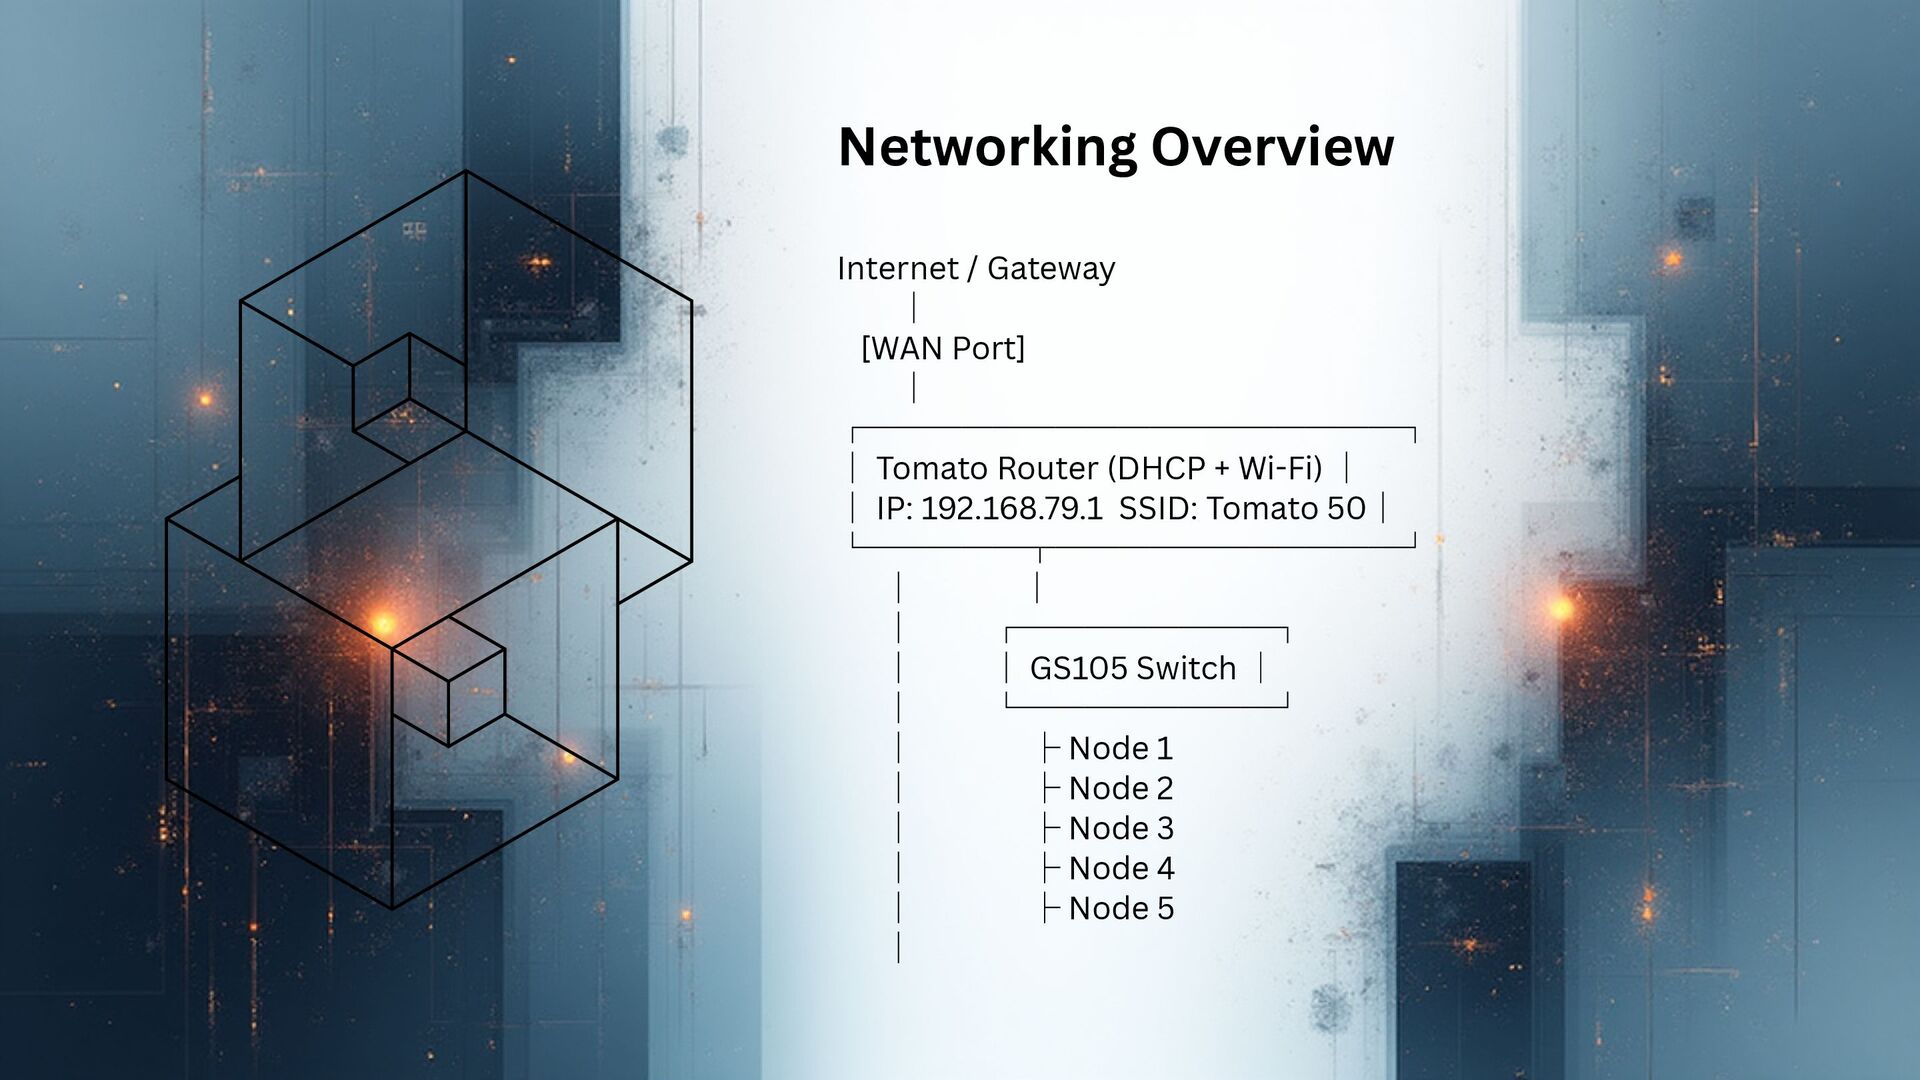
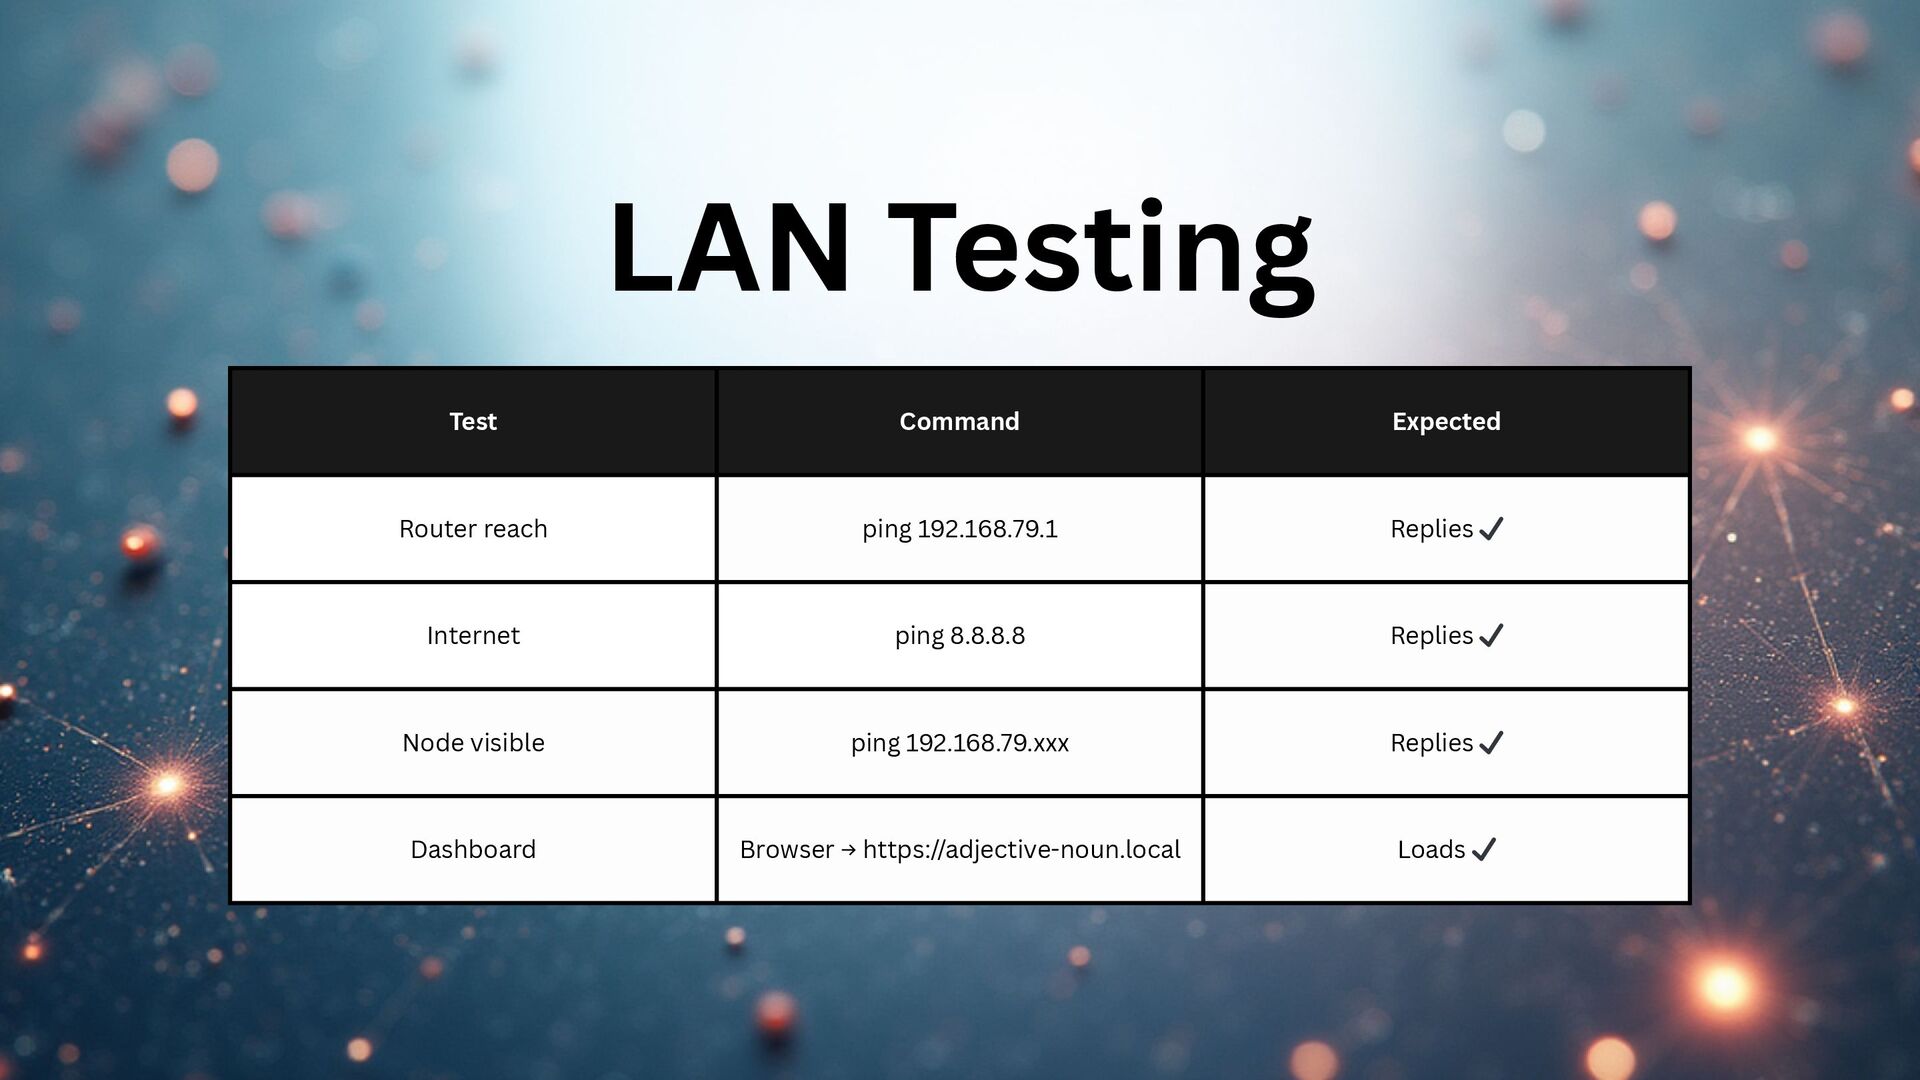
Network Architecture
Internet → Tomato Router (192.168.79.1) → GS105 Switch → Nodes
Post-Install Stack
- Bitcoin Core or Bitcoin Knots
- CLN, LND, Electrum, Mempool
- Manual USB backups (critical after opening Lightning channels)
Slides in this Deck
- Deck Overview (All Slides)
- Slide 1
- Slide 2
- Slide 3
- Slide 4
- Slide 5
- Slide 6
- Slide 7
- Slide 8
- Slide 9
- Slide 10
- Slide 11
- Slide 12
- Slide 13
- Slide 14
- Slide 15
- Slide 16
- Slide 17